Extract UI Icons from Screenshots for a Prototype
Recover individual UI icons from a screenshot: choose source quality, isolate crowded controls, inspect transparent edges, and prepare prototype assets.
A product screenshot can help you rebuild a prototype when separate assets are unavailable. The useful output is an individual icon with clean edges, not a rectangle containing the surrounding button, label and background. If you can export the original asset from the design file, start there: a screenshot has already flattened the layers.
1. Decide whether the screenshot is a usable source
Choose the original PNG or highest-quality image available. A tiny icon enlarged from a compressed chat preview will retain its missing detail. Check the icon at its intended prototype size before spending time on cleanup. Use images you own or have permission to reuse.
A plain toolbar background is easier to remove than a photograph behind the icon. If the background crosses the artwork or a badge covers part of it, extraction cannot recover the hidden shape. Find a better source or redraw that asset instead.
2. Select artwork without capturing the surrounding control
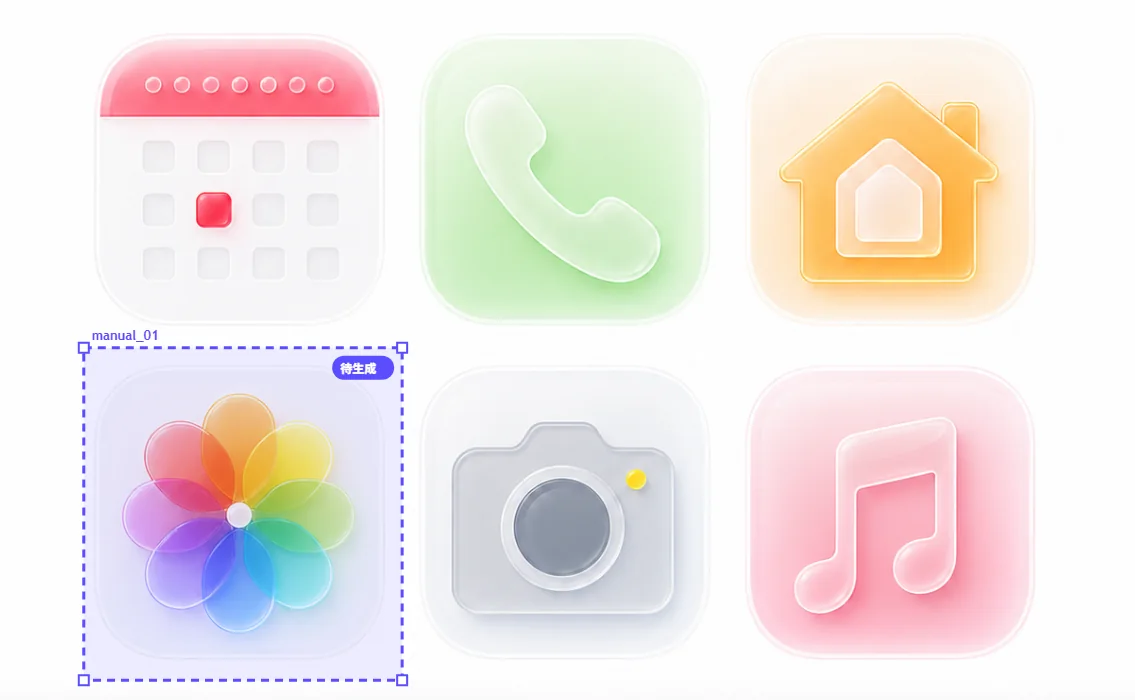
Start with automatic extraction for a group of clearly separated icons. Compare the detections with the screenshot: labels, separators and notification dots can become extra regions. For one crowded control, open manual selection and draw a box that includes its complete silhouette with a little space around it, while excluding neighboring text.
Keep intentional detached marks, such as a bell clapper or wireless signal, with the icon. When two objects genuinely touch, a tighter crop can remove a neighbor but cannot reconstruct the covered edge. Use the neighbor-fragment checklist to distinguish these cases.
3. Check both the outside and the inside
Open the result in Repair and compare light and dark backgrounds. A pale halo may disappear against white and become obvious on a dark prototype. Also inspect white interiors: the fill inside a camera may be intentional. Try the unchanged result before applying interior cleanup or edge shrink, and avoid applying one strong adjustment to unrelated icons.
4. Export for the prototype, then inspect at actual size
Use PNG when you want to preserve the screenshot's raster appearance. Keep an original-size reference, name files by their role, and preview them at the size of the intended control. Enlarging the export does not restore source detail. SVG is reconstructed geometry, not the original designer's vector file; inspect it separately if you need editable paths.
- Check that the label or button background is absent.
- Confirm detached marks and intentional white fills remain.
- Place the PNG on both light and dark prototype surfaces.
- Review all icons at the intended display size before handing them off.
Continue with the complete extraction example or open manual selection.
Free previews and paid delivery
Sign in to process 3 images per day, including examples. Free PNG exports have a maximum longest edge of 512px. Eligible accounts in the current trial receive 10 individual PNG icons per UTC day and one complete image as a PNG ZIP per UTC calendar month. The ZIP allowance is separate from individual PNG downloads. Other free accounts receive one PNG sample per image; check the allowance shown after sign-in.
The $1.99 24-hour pass includes unlimited image processing and PNG, WebP, SVG, ZIP, original-size and multi-size exports for 24 continuous hours from completed payment. One-time payment. No auto-renewal. The free allowance resumes at expiry. Compare the pass, Pro and Lifetime.